Learn how to make a stitched daffodil brooch with our quick and easy tutorial!
I defy anyone not to be cheered up by this cute little spring-time brooch. Once you see how easy this little stitched brooch is to make, you will be brightening up all of your outfits with it! In this tutorial I will cover every technique you need to make a stitched daffodil brooch including how to applique using bondaweb adhesive fabric, how to machine embroider the details and how to construct the brooch once you have finished stitching. I hope very much that you enjoy making and wearing it!

I first wrote the instructions for this gorgeous little stitched brooch a few years back for Love Embroidery magazine. They always ask me for such lovely projects that I thought I would share it here on my blog with you my beautiful readers! This is a great spring time make and would be a perfect DIY gift for Mother's Day. I have stuck with a traditional yellow colour-way but you could mix up the colours and textures to your liking!
- Scraps of cotton fabric in yellow, green and pink. We used:Pink speckled: Elouise - Her and history by AGF. Green patterned: Desert beyond - Cloud nine fabrics Yellow: Amber cirrus solids Cloud 9 fabrics
- 2 x pieces of yellow felt 15 cm x 15cm
- 1 x brooch back 2.5cm long
- Sewing needle
- Erasable fabric marking pencil or pen which erases with heat or water such as this one /products/water-erasable-fabric-pen-blue
- Black sewing machine cotton
- 30cm x 30cm piece of Bondaweb
- A printed copy of Free stitched daffodil brooch template
Some hints and tips
Feel free to play with the colours and patterns of your fabrics. Daffodils come in a variety of colour combinations, so this Is a great way to use up some of your fabric stash. Small patterns work well to give more interest to your brooch.
Save your iron from gettiing sticky bondaweb on it by covering your pieces with an old cloth before ironing.
Free machine embroidery can be a little scary to start with as you can feel a little out of control. Try not to worry too much or slow your machine down too much as this actually makes it harder!
Step 1
First of all, trace each coloured element of the design onto the bondaweb. You want to trace onto the smooth, paper-like side with the glue side down. If you are not sure which is which, the glue side will have a rough feel to it. Separate the elements of the design and trace each one separately.
You will need: one yellow piece for the petals, one pink trumpet piece and two green leaves. Cut a square of bondaweb out around each traced element and iron it to the back of the correct coloured fabric.

Step 2
Once the bondaweb is securely stuck to your fabric all over, cut carefully around each shape with sharp scissors. Next remove the paper backing from your shapes being careful to leave the glue from the bondaweb on the back of the fabric.
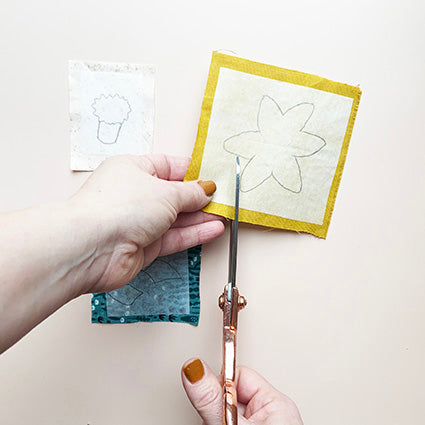
Step 3
Take one piece of your felt and arrange the daffodil pieces on top and in the centre to recreate the design.
The pieces will be the mirror image of your original drawn template. If you find this confusing it may be a good idea to take the original paper template and trace through the paper onto the back of the paper. You can then use this mirror imaged template to make sure your fabric shapes are in the correct place.
Iron carefully pressing down rather than sweeping your iron to make sure you don’t disturb the position of your daffodil pieces.

Step 4
Transfer the design of your daffodil onto the fabric pieces using an erasable pen or pencil.
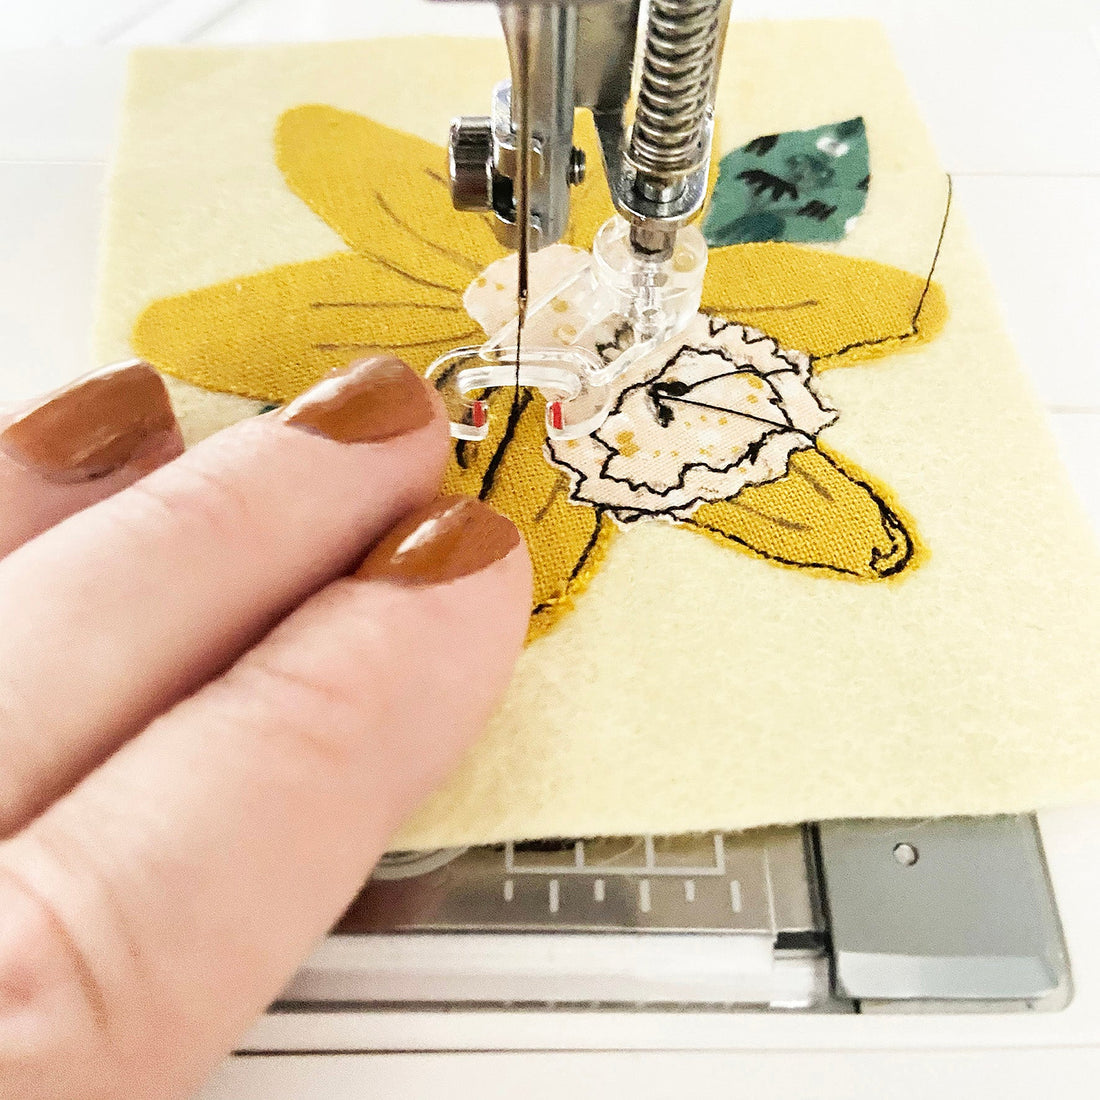
Thread your sewing machine with black thread and set it up to free motion embroider as per the instructions for your machine.
Free motion the design of the leaves, petals and trumpet of the daffodil, by moving your fabric around underneath the sewing machine following the pen marks you created earlier. you should try to work in one smooth motion to create the details. don't worry if the lines are a little messy, this will give your stitching character!

Step 5
Remove your design from the sewing machine and trim any loose thread ends. Cut a square of bondaweb from the remaining sheet, this should be bigger than your design but smaller than the piece of felt. Iron the bondaweb to the back of your design.
Remove the paper backing and place the second square of felt over the glued back of your design. Iron the two together, creating a neat back and two layers of felt on the back of your design.

Step 6
Cut carefully around your design removing the excess felt. Be careful here to make sure that none of the felt is showing, you may want to use some small sharp scissors to help you with the corners. Stitch or glue the brooch fastening to the centre of the back of your brooch

Voila! You have now learned how to make a stitched daffodil brooch and it is ready to wear or give away as a gift. Please do leave a comment if you have any feedback on the instructions as I always like to improve them!

Louisa Burtonshaw
Hi I'm Louisa, I'm a craft writer, maker and blogger and i'm passionate about mindfullness and wellbeing. I used to be an Interior designer so I love creating things for the home!