Diy sleep mask - Rise and shine
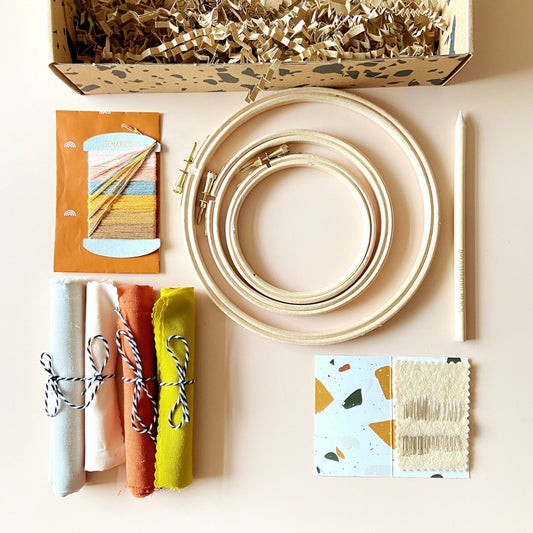
You will need:
25cm / 10 inch Wooden embroidery hoopStep by step guide
Step 1
Iron the piece of stabiliser onto the back of the 35x35cm piece of ivory fabric making sure to keep it central. Place the pattern beneath the fabric and trace the design and outline onto the centre of the fabric with an erasable fabric marker.
Put the stabilised fabric into an embroidery hoop so that the design is flat to the table and pull so that it is tight.


Step 2
Set up your sewing machine to machine embroider by dropping the feed dogs and fitting with an appropriate foot. Starting with the terracotta thread, embroider the main part of the sun, create an outline first and then fill in the rest of the space with forward and back motions. You will need to keep going over this in layers to build up the stitches to a point that you can’t see any fabric through the stitching.
Step 3
Work out from the main sun to create the rays of the sun, follow the lines al the way out to the end of each ray and then retrace your stitching on the way back, taking it slowly so that you don’t end up with two separate lines. Now using the same method, create the text to the right of the design.
Next Create the coloured dots, one colour at a time, using the peach , light peach, green and mustard threads, work the outside of the circles first and then fill in with a circular motion


Step 4
Now place the paper pattern piece back over your embroidered design, pin and cut around the outer line Cut out the rest of your pattern pieces. For each mask you will need: 1 x embroidered mask piece for the front, 1 x fabric mask piece for the back and a long strip of fabric measuring 85cm x 5cm. Cut a piece of cotton or wool wadding the same size as the inner outline of the mask. Cut your elastic to around 37 cm long depending on the size of your head.
Fold the long fabric strip in half lengthways, right sides together and iron. Sew along the length of the fabric using a 1cm seam allowance to make a tube.
Sew across one end of your tube about 1 cm from the edge. Trim the seam allowance to 5mm from your stitching all the way along the length of your fabric.
To turn the strip the right side out, take your knitting needle or chop stick and make a small pocket in the end that you have stitched for your stick to go into. Push against the stick and pull the fabric over the stick. Keep pushing the fabric over the stick until it is all the way through. Unpick the end that was sewn and smooth out.
Attach a safety pin to one end of the elastic, insert the safety pin into the tube you have made with the strip and feed it through. Hold the other end of the elastic and make sure it doesn’t travel up into the tube and when it gets close to the end pin the elastic to end of the fabric to stop it disappearing inside. The fabric will gather as you do this. Spread the gathers out evenly.


Step 6
Lay the front piece of the eye mask right side up. Right sides together, pin and sew the elasticated tube to the front piece at each side as marked on the pattern, using a 1cm seam allowance. Go over this stitching 3 or 4 times to strengthen.
Take the back piece of the mask and lay it over the front of the mask matching up the edges, pin together leaving a hole at the top, the strap will be inside, to make sure that it doesn’t get trapped when you stich it together you can pull it out of the hole. Stitch around the outside of the mask using a 1.5 cm seam allowance. Trim and notch the seams and iron.
Turn the mask the right way out and iron, insert the wadding into the mask and move it around until it lays flat, iron once more to neaten.
Ladder stitch the hole closed by hand.